WELCOME!

WELCOME!

Wednesday, June 25, 2008

Wine Update

The apricot wine has been bottled. We got an even 30 bottles and a few sips out of the carboy. Based on the small sip we took, our prediction is that it is going to be delicious. We'll know for sure in 6 - 12 months...


With the apricot bottled, we have moved on to two more projects. The first and more complex project is the fruit wine. We started 5 batches in 1-gallon carboys. Each of these should make about 5 bottles.

1) Mixed Berry
2) Strawberry
3) Blueberry
4) Raspberry
5) Raspberry from juice concentrate


We'll be bottling the juice concentrate wine soon because there is essentially no pulp involved. All of the others require at least 3 re-racks because there is a huge amount of sediment involved in using non-pre-musted fruits. The strawberry smells amazing but looks gross. They are all going to be very strong. Doing the measurement, they all dropped well under .99 in a short period of time. We also purchased some fruit-flavor enhancers for before we bottle to ensure the fruit flavor is still there.

The second project is a Chilean Malbec. We are using the large carboy to get about 30 bottles for this one. This particular recipe does not call for many steps. Only 2 reracks and not a large amount of time between them. We are going to be bottling this as soon as we pick up some corks and wash off the used bottles we have.

We'll probably be taking a small break after these batches to get through the summer months. If we can get our hands on some more fresh-picked berries (and Jersey is known for blueberries) we may end up making a few small batches here and there.

To date we have made 58 bottles -- and will be bottling approximately 55 more in the next couple weeks. I don't think I've ever imagined myself owning over 100 bottles of wine...... Going to have to start looking into building a nice winerack in the basement, something custom and cheap -- yet elegant.

We're working on developing a labelling system to be able to keep track of all these bottles. We're thinking of using brown recycled paper bags. Basically sharpy'ing on the date, wine type, batch and bottle number -- and then spraymounting it to the bottle. We don't want anything fancy and we'd like it to be homemade.

Cheers.

Monday, February 25, 2008

Batch #2 - Apricot Country Wine Part 1

With batch #1 - Black Cherry Pinot Noir, successfully bottled, KT and I moved on to our next kit - Apricot Wine. KT did the primary fermentation by herself while home with the baby, and from the look of it, we're having a lot more success. We have applied many of the lessons learned from the first batch and we're having great results.

She put all of the ingredients into the primary fermenter (plastic bucket) and we placed a napkin under the spigot to soak the minor leakage. We left the plastic cover off and covered it with cheesecloth. The initial SG reading was in the ballpark of 1.09. In 5 days it dropped to the target 1.04. At that point I squeezed the pulp to as dry as possible. A method we decided to try this time was to filter-pour.


I put our straining funnel into the secondary and tipped the primary over. The downside to this is obviously the amount of oxygen exposure and the fact that the bottom of the primary will get caught in the funnel, clogging it. Fortunately, the blockage was not significant and I feel we got nearly all the liquid into the secondary.

Once in the secondary, I added water and corked with the airlock. The yeast is still extremely active - to the point where we are wondering if it can over-ferment. The SG is still dropping rapidly, at 1.03 within 24 hours. The next step is to re-rack at 1.0 and add some K-Meta to slow the fermentation. We then rack again in 3 months and, depending on the taste/SG/etc., can bottle if we choose. If we are going to wait 3 months - there may be no sugar left at all! The color is a lovely yellow, similar to pineapple.

Tuesday, February 12, 2008

Batch #1 - Black Cherry Pinot Noir (Part 3)

So we're two weeks later - a total of 28 days have passed since initially mixing the must. According to the directions, it's time to bottle. Here's what we did:

Step 10: Gathering and Cleaning Bottles

Thanks to the generosity of some friends and family, as well as my own personal saving, we have over 35 bottles ready for this first batch. There are only a few bottles that match any other bottle and they are all shades ranging from brown all the way to turqoise. They are all from various wine-makeres and have distinct shapes. They all also have wine labels on them, which leads us to the step that was far harder than I thought it was going to be:

The first thing I decided to try was filling the sink with steamy water and dropping a few dollups of detergent in with it. I let them soak for a good 20 - 30 minutes before checking on them.

Immediately, I knew the bottles that would be easy and the ones that were going to take some elbow grease. Some of the labels came right off with no sticky residue, no scraping and all in one piece. Others were not so easy. I tried a tile scraper, a knife, my nails, sponges, etc. and had a heck of a time getting some of hte labels off. After two nights of doing this, I managed to get enough bottles for this first batch.

Once the bottles were all cleaned off, I went back and looked at them to see if they had any streaks or residue that might make the bottle a bit unsavory. I used an orange pumice cleansing solution to get any last remnants off -- Thanks Jason, Denise, and KT for the elbow grease on this step!

We then put the bottles on towels while cleaning out the dishwasher. As a final precaution (and instead of making another cleansing solution) we ran all the bottles through the dishwasher to get them sanitized. To do that, we had to take the top rack out...but they all fit in two average sized loads.

Looking at the bottles all cleaned off, I started to get excited. I guess it finally hit home that we were about to have a couple cases of wine! It was a very exciting feeling!


Step 11: Testing the wine and siphoning

The next step is where the artistic influence came in. I poured a little into a glass using the wine thief and tasted it. I gave a sample to everyone around me and got their opinion on it. There was NO DOUBT it was a fruit wine. The black cherry taste exploded to the point that the "wine" taste really couldn't be noticed. I did some more research on specific gravity to better understand why the alcohol taste wasn't really strong. The reason comes back to the below posts. The SG was 1.030 which is pretty high for a wine. It turns out that the alcohol content will only be about 4% which is like drinking a beer. It's pretty weak. Most wines are anywhere from 11% to 14%.

In the timeline of a wine-makers learning curve, I am still at the bottom. I do not consider the low alcohol content to be bad. I know where the mistakes were made, I know how to fix them, and I still ended up with a GREAT summer drink. The flavor is great, very sweet (because the sugar didn't get eaten as much as it should have) but great, nonetheless.

Just for fun, we decided to start experimenting with the flavor. We added a little pinot grigio from an unnamed commercial vintner and tested ratios. We came up with one that makes the wine taste a lot like Sangria...which is very good.

We decided to make 9 bottles of "Black Cherry Pinot Sangria" and the rest of the carboy would be straight Pinot Noir. The color turned out great and the flavor is very drinkable.

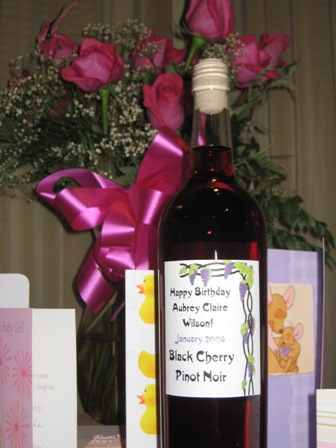
The Sangria coloring was very light because we used a white wine to blend. Holding it up to the light, it almost has a true cherry color, almost strawberry in its redness. The picture here is through a clear bottle in standard lighting for a dining room. We have a bunch for bottles that are yellow, green, black, etc, that make the wine shine a very different color.

To get the wine into the bottles we had to siphon -- that was an experience! I didn't think it would be difficult, but it was quite messy.

Thankfully we planned ahead and did it in the kitchen sink/counter/floor. There were numerous occasions of overflow! I'll put a few notes about this in the "Lessons Learned."

Step 12: Labels

The labels I got were from http://www.finevinewines.com/ or the Winemaker's Toy Store where I got the kit. The paper they print your custom message on is adhesive when moisturized. We simply dabbed the back with a wet sponge, aligned, and slapped it on.

I mentioned before that the wine was made during the month that my first child would be born. As such, I put a cheesy message on the label and will celebrate her birth with every bottle given or personally imbibed. Nothing fancy, but they look great on the bottle. They went on very easy and I'm hoping they come off, just as easily when I recycle them.

Overall, we ended up with 27 bottles, which is probably more wasted than I was originally planning. It is still a great volume of wine that I'm pretty excited about. For a first batch, not too bad. Just typing this post, I can almost smell the sweet fruit from 50 miles away!


Lessons Learned:

Alright....lots to say:

1) At the bottling stage, rerack to another carboy before bottling. There was a ton of sediment still during this stage and it most likely shorted me a bottle or two worth of clear because each time I had to start the siphon, it would stir the lees up slightly. My next batch, I will put the wine into the plastic container that I hate for the exact reason I hate it...it has a spigot. Any sediment that does go into the primary bucket would sit below the spigot line. The best benefit of the spigot is controlling the flow of wine. I struggled greatly with timing the flow using a big tube-siphon. If I slowed it too much, it would backwash in the tube and get airbubbles. So I haven't given up on the primary bucket at this point - but I will have to wait until next batch to test it.

2) Temperateures of fermentation. I always had it in my head that putting wine in a basement (wine cellar type space) was the perfect conditions. It didn't prove to be that way. It is the middle of winter which means my basement was probably too cold. I had the wine by a tiny window that probably let in some cold air during the windier days. Overall, the primary fermentation process was probably in the high fifties to low sixties. From what I'm reading now, you want it in the 70s, if possible. Next batch will go on my second floor because it's much warmer up there. I will most likely put it in the bottom of the linen closet and put a bunch of blankets around it for insulation. The potential negative aspect of this is the carrying of the carboy. I have a small bathroom sink upstairs, so I may have to do the process up there.

3) Bottles - buy them or give yourself ample time to clean them. Find out what bottles have labels that peel off when heat is gently applied, and avoid the ones that require a razor blade, a lot of warm water, and an impossible amount of patience. If I didn't have 4 people helping me over two days, it would have taken a very long time to get the bottles ready. Another small thing about the bottles - I had a Black Tower Rivaner wine at my wedding and had saved a bunch of the bottles to drink later. One of the recycled bottles was from that -- and I quickly realized that opaque bottles are difficult to fill. Not seeing when they're full made it messy...

4) Getting help - a lot of the process was made easier with two people. Having someone pour the ingredients while the other stirred, having two hands to lift the heavier stages, and the time saved from doing more than one thing at a time made the process quick and enjoyable. Perhaps I'm a sucker for conversation, but it was overall more fun being able to talk about what we were doing and sharing in the excitement of making something like wine.

5) Funnels - get multple sizes and get them early on. Looking back at the various stages, funnels could have greatly helped with some of the transfers and the bottling. The one funnel I do have is a bit large and wouldn't fit into the bottles. It has a strainer in it as well, which will be helpful for certain types of wine down the road.

6) Specific Gravity - this was my biggest downfall for the first batch. Instead of using the SG as a trigger point to move to the next step, I used the directions that indicated certain amounts of time. SG is a better indicator of when the wine is ready for the next step. The next batch will be run based solely on SG. I believe you can leave the hydrometer in the wine while it's fermenting to watch it drop. I will keep an eye on the forums to confirm this, but it would be nice to be able to look into the wine and see the thermometer and the hydrometer readings without having to remove the cork.

7) Initial SO2 release. The directions I received made no indication that I should leave the top off the primary fermenter for the first day or two to stimulate the yeast. A lot of research I've done recommends leaving it open with a cheesecloth cover to prevent anything from getting in and out other than air. The next batch I have says in the direction to leave uncovered for 24 hours. This, in conjunction with leaving in a warmer area, should solve my SG problem.

8) Floor Corker - I used a hand corker. It wasn't particularly difficult but I can see how it could lead to accidents. I had to put a lot of pressure on it and in a very vertical motion or it could have broke the bottle, broke the cork, or slipped off the bottle and hit something nearby. I can see how a good floor corker would be beneficial, especially if you're going to be doing more than 27 bottles in a night. It can get tiring.

Thursday, February 7, 2008

Batch #1 - Black Cherry Pinot Noir (Part 2)

So two weeks later, we pick up at:

Step 5: Cleaning

More cleaning - yay.... Before doing anything, we clean out the plastic fermenter with the spigot and the various siphoning and stirring tools. I didn't make a spritzer bottle as previously planned, instead we tried using the bucket as the "sink."

We filled it with two gallons of water and put in the cleansing solution - then stirred. We cleaned the whole bucket inside and out. We then dipped the tubing, the spigot pieces, the funnels, the stirring spoon, the wine thief and the hydrometer to clean them.

Once done, we rinsed everything. As previously mentioned, I am not sure if rinsing is required. I examined the bottle with the cleaning solution and it says that it requires rinsing, yet the forums and directions on the kit indicate it is not necessary. I figured it wouldn't hurt.

Step 6: Siphoning

I then took the bucket and siphon tube to the basement where the wine had been sitting. I pulled the cork out of the carboy and was immediately hit with a wine smell - it was wondeful. There was no mold or vinegar smells. This was encouraging. I looked at the bottom of the glass carboy and identified how much sediment had settled.

The next step is to unwind the siphon tubing and lower into the carboy to just above the sediment. I had never siphoned something before -- but I saw it done on t.v.....so I was an expert...right. Regardless, I worked it out with little incident, other than a quick taste. Keeping the plastic fermenter bucket below the glass carboy, I put suction on the tube and filled the siphon, then lowered the end to the bottom of the fermenter. I had read that it is best to avoid letting the wine splash. I think it promotes oxidation, which I think is bad...if I remember correctly.

The siphoning went very fast. Much faster than using the spigot. The entire 5 to 6 gallons filled the plastic bucket within moments. When we got to the bottom of the glass carboy, we had to tip it slightly to pool the remaining liquid. The remaining sediment looks like rusty mud. This is actually called "Lees."

Step 7: More Cleaning

We carried both containers upstairs to the kitchen for the next step. Let me say - carrying a five gallon glass jar is quite heavy and slippery. I would not recommend doing this if you can think of an alternative. I now keep the carboys stored in the adjacent room to avoid the risk of dropping so much staining liquid - and to save my back.

The glass carboy is not an easy thing to clean. We filled it with water to get the Lees out and used the big angled scrubbing brush. Perhaps it was because I had never used such an odd angled toilet-brush-looking contraption, but I couldn't get it to give the good scrub I wanted. We kept rinsing the inside with water and occasionally the solution, but it seemed that a little sediment always remained. If anyone has a recommendation on how to clean this easier, it would be greatly appreciated! (total immersion and soaking?)

Step 8: Dumping more ingredients and stirring

Per the directions in the kit, now is the time to add a million more ingredients and stir "vigorously" for a ridiculous amount of time. I can see now why some people say they like to use an electric drill with a mixing attachment. We added an ingredient, stirred for a minute, added another ingredient, stirred 5 minutes, another, another minute, etc.

When all was said and done, the must smelled great. It now had the black cherry finishing in it and smelled very sweet. The potassium sorbate was added to stop fermentation -- which is where our problem started.

We were finished stirring when we read that it was time to measure the specific gravity. Oops - it says not to continue if the must has not dropped below .99 and ours was reading 1.030. I am not sure exactly what this means.

Step 9: Rerack

We noticed the bucket was leaking again. Immediately we attached a tube to the spigot and slowly drained it back into our recently cleaned carboy. It has been there almost 2 weeks at which point we will need to do another rerack or bottle.

Lessons Learned:

The plastic fermenter bucket is still not working. I tightened the nut/screw assembly as tight as humanly possible, added various levels of washers and I cannot get it to not leak. No matter what, it drips through the spigot slot and thankfully onto the tile floor that can be cleaned. I have now designated the bucket as transitional equipment only. I purchased another glass carboy that will be used in place of the plastic bucket. If I had to buy the set again, I would get a bucket without a spigot.

Specific Gravity - keep the hydrometer in the carboy - and keep an eye on it every few days. I think my basement might have been a little too cool and it kept the fermenation process at a slower pace than needed. Next time, I will make sure I have the temperature at optimal levels.

I posted on the forum listed on the right side "Wine Making Forum" my specific gravity problem and was told to call the distributor of the kits that I purchased from. I'm worried I have a stuck fermentation and the wine will be ruined. Hopefully I'll just end up with useable wine that is only slightly stronger than it was supposed to be.

I'll post an update once I speak with George at the Winemaker's Toy Store. (http://www.finevinewines.com/)

What an adventure!

Tuesday, January 22, 2008

Batch #1 – Black Cherry Pinot Noir (Part 1)

On January 13th, 2007 my handy sidekick-wife, KT, and I decided to tackle the first step of the home wine-making process. My initial plan was to wait until the day my daughter is born and spend a few hours that night mixing up the must. I decided it would be a better idea to start it beforehand – in the same month instead. Yes…sappy – a wine dedicated to my first child…

Anyways—

The first step was to inventory the equipment I have and identify what is used and when. A lot of the equipment looked very foreign to me and I was not sure exactly how they should be used. I had done a little research on the process, but never really delved into the specifics of how each tool was used.

Using the directions that came with the kit, I identified the tools for the first step.


  • Water – easy enough – from the sink if not too contaminated – i.e. Sulfur smelling

  • K-Meta Powder – Also known as Potassium Metabisulfate – bacteria killer extraordinaire!

  • Bentonite – a gray grainy substance that is really a form of Clay (yes, like soil)

  • 23-Liter plastic fermenting bucket – huge bucket with a lid and level-markers for total volume

  • Grape Concentrate – a gooey rich red liquid in a clear plastic bag with a plastic cap

  • Thermometer – floats in the must and tells you things…

  • Wine Thief – neat little tube that you stick in the must and it takes a sample using a one-way valve

  • Hydrometer – drops into the wine-thief to measure the specific gravity

  • Yeast – a small pack – not sure if it is “wine-yeast,” “bread-yeast,” or some other form

STEP 1:

The first step was to clean everything with a cleaning solution. I had read that this part is a pain because it is laborious and lacks any immediate reward – all it does is keep your wine from going bad….you know…moot things like that.

I mixed the k-meta with some water and rubbed everything down. I wasn’t sure if I was supposed to rinse with water or not – so I did thinking it couldn’t hurt. Reading through some forums afterwards, it looks like that is not required; air drying will do the job too.

A lot of people make the solution in a spray bottle (i.e. Windex) and spray everything and let it sit – I LOVE THE IDEA! After making a huge mess in my kitchen trying to wash a 23-liter bucket, I think it’d be easier with the spray bottle. I just need to do some research on what the proportion would be for a bottle that size. I believe I used a 1 tablespoon to 1 gallon proportion – but I’ll double check.

STEP 2:

Now that the equipment has been cleaned, it was time to start making them dirty again! First thing is to pour 2 gallons of water (16 cups per gallon if using a standard kitchen measuring cup!) into the bucket and mix the bentonite thoroughly. The water will look dirty at this point – not very appetizing. You then add the entire bag of grape concentrate. Careful when pouring this in – it can splash and stain, especially if it’s a dark wine like Pinot Noir! To get the rest out of the bag, just put some hot water from the sink into the bag and shake it around a little, then pour. It should get the residual concentrate. Then fill to the 6 gallon mark with water and stir profusely.

STEP 3:

Now you have a heavy plastic bucket of purplish-red must. Congrats! The next step would be to add the yeast and close the lid, but I would recommend moving it to where you would like to store it before you add the yeast. The directions say that you shouldn’t shake it up once the yeast has been added – not really sure why at this point. Regardless, set the bucket where you want, sprinkle the yeast on the surface and close the lid. In the lid I received, there is a rubber gasket hole called a “Bung” that you must place the airlock. Jam the pointy end down through the hole, take the top off and fill it half-way with water, and replace the airlock-lid. In the coming 48 hours, you should see bubbles in the airlock indicating that the fermentation process is occurring – if it doesn’t start happening, I guess something might be wrong….I believe the bubbles are caused by Carbon Dioxide escaping while the yeast eat sugars – leaving behind alcohol as its byproduct

STEP 4:

Let it sit for 2 weeks – according to my directions. From what I have read, it looks like there is a lot of discrepancy on how long the primary fermentation process takes. I’ve seen anywhere from 4 days to 3 months – so I’ll just follow my directions.

NOW – some things I noticed:

I initially used the plastic bucket with the spigot as described above. This ended up being a problem for me because when I picked up the bucket, the plastic bent slightly and some of the liquid squeezed through the Spigot hole. When I attached the Spigot, there is a plastic washer that gets screwed on from the inside. My guess is that it was not screwed on tight enough and some liquid was able to slip through. But, once the liquids have been added, I wasn’t about to reach my full arm into 6 gallons of must…

To fix the problem, I drained the entire contents into the glass carboy that was initially going to be used in the second phase. I was told it makes no difference. Going forward, I like using the glass better anyways – you can see what’s going on through the glass, there is only one exit point in the top (which is corked), and it looks much cooler than a big plastic bucket….

Every couple days I go down to the basement where I am storing the wine and look to see if everything is alright. I’m checking the airlock (which is now placed in the stopper) and the liquid to see if there is any mold floating on top. I do not stir and I have not been letting air into the wine. Some of the forums indicate that during the first phase, it is okay, maybe even beneficial to have air getting into the must to help with the fermentation.

I’m not, but so far – so good.

Now I’m in the waiting game for a few more days (January 27th) before I start phase 2 – yikes!

Monday, January 21, 2008

Why Wine & Me?

For a long time I never had an interest in tackling the intricacies of wine. The hundreds of impossible pronunciations (Geverztraminer? or Beaujolais?), the appropriate food pairings, knowing the best 'year' to drink, and the ridiculous price seemed out of the question. I figured it was a hobby for the rich who didn't know what to do with their money.

I've changed...a little. The names are still difficult to pronounce, I still don't know the right pairings unless I have a chart in front of me, and the year of the wine makes little difference. I DO, however, know that cheap bottles ($7 - $13 range) taste just as good...to me...as the $25+ bottles. I know some of the more general differences between grape types and I have slowly been learning some of the colorful descriptor words like "Robust," "Semi-Dry," "Bitter," etc. I don't know which is which -- so knowing them isn't really doing me any good yet. In the coming life-time I plan on sitting down with several types of wine in front of me and making an effort to differentiate the adjectives.

So you may be wondering why did I go from not caring to having any interest at all? My first positive experience with wine came from a memorable wine-bar located in Galway, Ireland. I was studying literature at the University of Galway for a semester. The bar was a quaint piano bar that didn't serve food - only wine from a comprehensive list pulling from thousands of bottles on display and hidden in the back. I was with two friends from the Rhone Valley in France, my Irish roomate, his friend, and a couple other americans. We all split a few cheap bottles selected by the French 'experts.'

We had an amazing time. The music filled the room with a lively spirit fueling everyone's conversations. I never would not have thought that wine could be paired up so well with talking. I think that was the real turn-on for me. The ability to sit around a rustic old wooden table with eight other people discussing everything from politics in our respective countries to how school was going -- all the while, at the next table over, an elderly couple was celebrating their 50th wedding anniversary by opening a bottle they stored there when they got married. The whole bar toasted with them by screaming out "Slanche!" It still gives me goosebumps remembering the expression of pure joy on their face.

We had arrived at the bar at about seven that night and sat and drank and socialized until about three in the morning. The buzz we got on the wine was only intensified by the magic of conversation. It was a taste of culture that was comfortable and appealing. It has left a lingering taste for more.

So here I am now, extremely interested in trying to replicate that experience. I figure a great place to start would be with the wine.

I received my wine kit this past Christmas season (2007) from KT and have already begun my first project. I will be making a Black Cherry Pinot Noir by Orchard Breezin'. Once I get some pictures, I will post the process and progress. My hopes is that I can keep a history of my learning experience and, if all goes well, get a few other people interested in taking the same journey.

It's relatively cheap. The whole start-up process should be somewhere in the $100 to $150 range. That looks like a high price, but that includes the first grape concentrate. In the end, your first batch will make somewhere between 30 and 35 bottles calculating out to be $4 to $5 per bottle in the end. As you go on, it'll be cheaper if you save bottles. You'll end up making wine at $2 to $3 per bottle and most likely have a drink equivalent to what's on a store shelf, if not better.

The set I received was ordered from "The Winemaker's Toy Store" at www.finevinewines.com. Everything was sent in one piece and with a good set of instructions. I'm sure there are stores in your local area if you didn't want to get something offline. I am very satisfied with the materials received from them, but the shipping & handling was a bit pricy. It is to be expected when sending a 6-gallon glass jar though...so I expected it.

You'll also have gifts for any party, holiday, birthday, or special occasion. It means so much more if you make it.

So -- here we go - round 1. I'll keep you posted...